Objective:
We want to create a CDC data pipeline from RDS Postgres using the Debezium Postgres source connector which will capture all the data events from the mentioned tables and pass on them to the designated topics for downstream application processing.
We need to execute below steps:
Part 1: Launch MSK cluster
Part 2: Launch a Kafka admin client.
Part 3: DB changes
Part 4: Provision a Connector
Part5: Validation
Part 1: Launching MSK cluster.
We will be using a bare minimum configuration to avoid the costing concerns. Will create a new VPC and private subnets to host MSK and later on do the VPC peering between MSK VPC and VPC where our applications are hosted.
Step 1.1:
Go to AWS console -> Search MSK -> Create cluster then In Cluster Settings
- Select cluster creation method as ‘custom create’
- Cluster type as ‘Provisioned’
- Broker type -> t3.small , No. of Zones -> 3 and Storage as 100Gi
- Select MSK default configuration.
Step 1.2: In ‘Networking Section’ select your existing VPC.
- Select zones and subnets.
- Create a new Security group with new name i.e. MSK-SG-01 and select your VPC with all default IN/OUT bound rules (we can edit them later)
- Now browse for your SG and delete the existing SG.
Step 1.3: In ‘Security Section’
- Select ACL as ‘Unauthenticated access’ and ‘IAM’ (optional)
- Encryption as ‘Plaintext’ and ‘TLS’ both
- Rest all default settings.
Step 1.4: In ‘Monitoring Section’
- All default and create the cluster.
Part 2: Launch a Kafka admin client.
Since we will be creating that in the private subnet hence it won’t be accessible with public IP. If you have a bastion box set up for your infrastructure than you can SSH into from there to perform below activities
- Create a EC2 instance with in the VPC where your MSK is hosted.
- Create a new SG with all default settings.
- Create Instance
- Edit the MSK SG inbound rule to receive the traffic from the EC2 instance. GOTO MSK dashboard -> select properties -> edit Inbound -> Type All traffic -> Source your ec2 instance -> Save.
Step 2.1: Setting the AWS CLI to interact with Kafka infra:
// configure aws cli
aws configure
// now give your region i.e 'ap-south-1' // List clusters aws kafka list-clusters // Get bootstrap broker details: aws kafka get-bootstrap-brokers --cluster-arn <<cluster-arn>> // Describe cluster: aws kafka describe-cluster --cluster-arn <<cluster-arn>>
Step 2.2: Setting the Kafka on EC2 to validate and do the operations.
// set up java
sudo yum install java-1.8.0
// download kafka
wget https://archive.apache.org/dist/kafka/3.4.1/kafka_2.12-3.4.1.tgz
// untar the kafka zip
tar -xzf kafka_2.12-3.4.1.tgz -C ./kafka
Step 2.3: Custom Kafka config for auto creation topics.
Create a file with name “kafka-topic-auto-create-config.txt” with below config.
auto.create.topics.enable = true
zookeeper.connection.timeout.ms = 1000
aws kafka create-configuration --name "debezium-connector-kafka-config" --description "MSK config for debezium postgres connector" --kafka-versions "2.8.1" --server-properties fileb://{PATH_TO_KAFKA_CONFIG_FILE}
we have to be bit careful while giving the file path as it warrants two forward slash and then file path i.e fileb:///home/ec2-user/kafka-topic-auto-create-config.txt
Kafka related commands:
List:
/home/ec2-user/kafka_2.12-3.4.1/bin/kafka-topics.sh --list --bootstrap-server <<boot-strap-servers>> --topic test-msk-topic

Create:
/home/ec2-user/kafka_2.12-3.4.1/bin/kafka-topics.sh --create --bootstrap-server <<boot-strap-servers>> --replication-factor 3 --partitions 3 --topic test-msk-topic

Consume:
/home/ec2-user/kafka_2.12-3.4.1/bin/kafka-console-consumer.sh --bootstrap-server <<boot-strap-servers>> --topic test-msk-topic --from-beginning

Produce:
/home/ec2-user/kafka_2.12-3.4.1/bin/kafka-console-producer.sh --broker-list <<boot-strap-servers>> --topic test-msk-topic
Part3: DB changes.
Assuming our RDS Postgres instance in not public and can be accessed only from the private subnets.
- Go to Parameter Groups from the RDS Dashboard and click Create Parameter Group. [we can choose to copy and create the same parameter group already applied]
- Name this parameter group something like cdc-enabled-postgres-group, locate the option with the key rds.logical_replication and set the value to 1. Click Create Parameter Group.
- If your DB instance status has transitioned to ‘available’, click Modify.
- Scroll to Additional Configuration, set the initial database name to Postgres and switch the parameter group to the one you just created.
- Schedule the modifications to take effect immediately and click Modify Instance. Your instance state will transition to ‘Modifying’.
- Once the instance is modified, you’ll need to reboot it for the rds.logical_replication setting to update. Select your instance, then click Actions > Reboot.
- Edit the RDS inbound rules to allow the request from MSK VPC
To verify that your wal_level property is set to logical by running the following command from any PG client:
SHOW wal_level;
Creating a ‘Debezium’ role for our connector with proper privilege’s:
postgres=> CREATE role debezium WITH PASSWORD 'your-pwd' login;
CREATE ROLE
postgres=> GRANT rds_superuser TO debezium;
GRANT ROLE
postgres=> GRANT SELECT ON ALL TABLES IN SCHEMA public to debezium;
GRANT
postgres=> GRANT CREATE ON DATABASE postgres TO debezium;
GRANT
postgres=> CREATE TABLE public.debezium_heartbeat (heartbeat VARCHAR NOT NULL);
-- debezium_heartbeat table will be used to check the heartbeat of connector
-- if you have any other DB's also under that, different schema's and you want
-- it to be interacting with them, then GRANT previlleges for them as well
Part 4: Provision a Connector.
Step 4.1:
- Compile “Before you begin” section under this
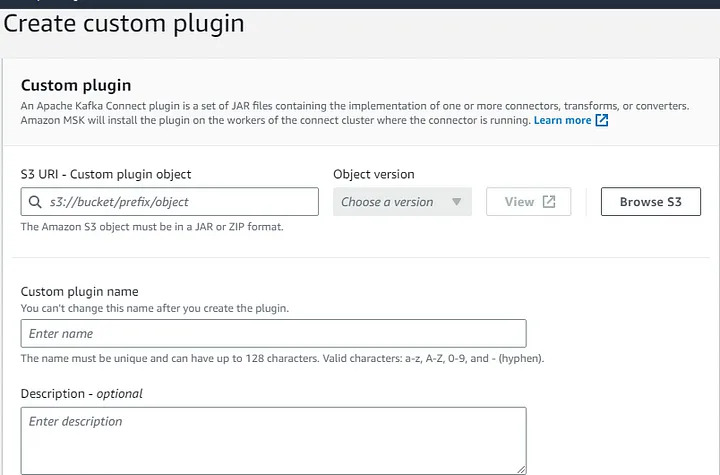
Step 4.2: Create a S3 bucket for custom plugin.
there are multiple ways and documentation to configure this however after going through couple of them this is the simplest solution I come up with
- Download the Postgres connector plugin from debezium 2.x version official site
- Download and extract config provider
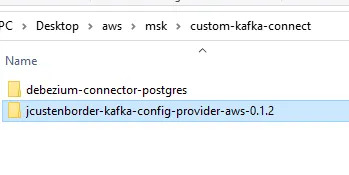
- Place the following archives into the same directory:
- The debezium-connector-postgres folder
- The jcustenborder-kafka-config-provider-aws-0.1.2 folder
- Compress the directory that you created in the previous step i.e. custom-kafka-connect into a ZIP file and then upload the ZIP file to an S3 bucket.

Step 4.3: Create a S3 bucket for custom plugin.

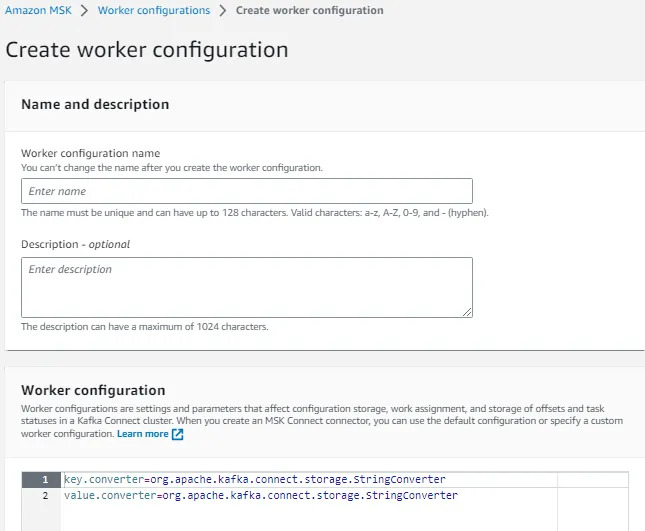
Step 4.4: Create a custom worker configuration with information about your configuration provider.

use below worker config.
key.converter=org.apache.kafka.connect.json.JsonConverter
value.converter=org.apache.kafka.connect.json.JsonConverter
config.providers.secretManager.class=com.github.jcustenborder.kafka.config.aws.SecretsManagerConfigProvider
config.providers=secretManager
config.providers.secretManager.param.aws.region=<us-east-1>
However, this is an optional we can use the default one while creating our connector.
Step 4.5: Create access permission.
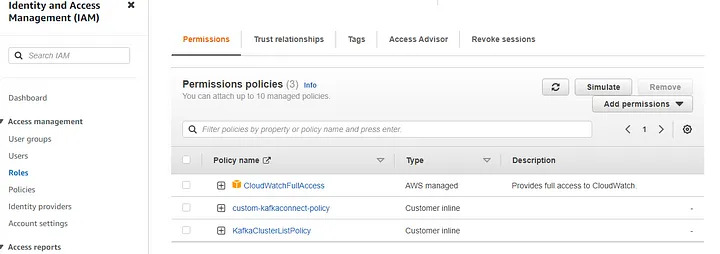
Create Custom-AwsRoleforKafkaConnect Role with policies as below.

KafkaClusterListPolicy [Created as inline policy]
{
     "Version": "2012-10-17",
     "Statement": [
          {
               "Sid": "VisualEditor0",
               "Effect": "Allow",
               "Action": [
                    "kafka-cluster:DescribeTopicDynamicConfiguration",
                    "kafka-cluster:DescribeCluster",
                    "kafka-cluster:ReadData",
                    "kafka-cluster:DescribeTopic",
                    "kafka-cluster:DescribeTransactionalId",
                    "kafka-cluster:DescribeGroup",
                    "kafka-cluster:DescribeClusterDynamicConfiguration"
               ],
               "Resource": "*"
          }
     ]
}
custom-kafkaconnect-policy
{
     "Version": "2012-10-17",
     "Statement": [
          {
               "Effect": "Allow",
               "Action": [
                    "ec2:CreateNetworkInterface"
               ],
               "Resource": "arn:aws:ec2:*:*:network-interface/*"
          },
          {
               "Effect": "Allow",
               "Action": [
                    "ec2:CreateNetworkInterface"
                ],
                "Resource": [
                    "arn:aws:ec2:*:*:subnet/*",
                    "arn:aws:ec2:*:*:security-group/*"
                ]
          },
          {
                "Effect": "Allow",
                "Action": [
                    "ec2:CreateTags"
                ],
                "Resource": "arn:aws:ec2:*:*:network-interface/*"
          },
          {
                "Effect": "Allow",
                "Action": [
                    "ec2:DescribeNetworkInterfaces",
                    "ec2:CreateNetworkInterfacePermission",
                    "ec2:AttachNetworkInterface",
                    "ec2:DetachNetworkInterface",
                    "ec2:DeleteNetworkInterface"
                ],
                "Resource": "arn:aws:ec2:*:*:network-interface/*"
          }
     ]
}
Step 4.6: Finally create a Debezium Postgres connector.
- Choose the plugin.
- Choose the MSK cluster with NONE authentication type.
- Provide below configuration [Debezium postgres connector config]
- Connector capacity → provisioned
- Worker configuration → default <or provide the custom one created as above>
- AccessPermission → Custom-AwsRoleforKafkaConnect
- Create a cloud watch log group for the logs [It’ll help to debug the issues]
Debezium postgres connector config
connector.class=io.debezium.connector.postgresql.PostgresConnector
database.user=debezium
database.dbname=<<your-db-name>
database.server.id=123456
tasks.max=1
database.server.name=<<your-rds-instance-name>>
plugin.name=pgoutput
database.port=5432
topic.prefix=postgres
database.hostname=<<your-rds-host-name>>
database.password=<<your-db-pwd>>
table.include.list=<<schema-name.table-name>>
database.whitelist=<<db-name>>
internal.key.converter=org.apache.kafka.connect.json.JsonConverter
internal.value.converter=org.apache.kafka.connect.json.JsonConverter
value.converter=org.apache.kafka.connect.json.JsonConverter
key.converter=org.apache.kafka.connect.json.JsonConverter
internal.key.converter.schemas.enable=false
key.converter.schemas.enable=false
internal.value.converter.schemas.enable=false
value.converter.schemas.enable=false
transforms=unwrap
transforms.unwrap.type=io.debezium.transforms.ExtractNewRecordState
Part 5: Validation
- To validate the flow, you have to log in into the EC2 Kafka admin client.
- List the topic which shall be already created already with the naming convention as postgres.<schema-name>.<table-name>
- check with the message with below command.
/home/ec2-user/kafka_2.12-3.4.1/bin/kafka-console-consumer.sh --bootstrap-server <<bootstrap-server>> --topic <<topic-name>> --from-beginning
Conclusion:
Congratulations! your CDC pipeline is now created.


